Hi, for those who are interested in how the chess pieces were made i'm gonna try to explain and show you here below. Just a little warning; i've taken as many pictures as i could because they tell a thousand words so i'm gonna post them all :))) But i also wrote some down to explain a bit further.
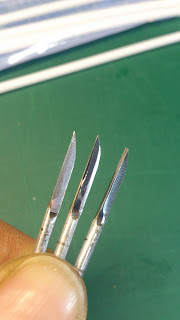
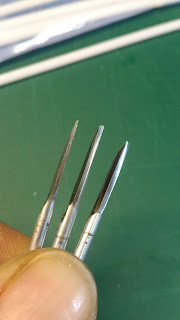
Then there are the tools i've used to turn. First these 3 cutters. Initially created to carve wood, but i've found them very suitable for this kind of work. Actually; i feel any tool is suitable, as long as it's sharp and or capable to take away material and last but not least... it needs to be small enough. These 3 are made out of HS steel, grind down to a decreasing width so i have a choice depending on the detail I want to add while turning.
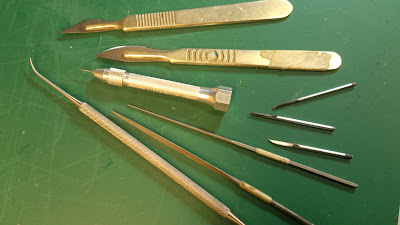
This is everything i used, all together. From top to bottom;
- 2 scalpels that are useful to create very fine lines. the bottom scalpel has a round & curved edge that is useful too, to flatten and smooth out the surface of any tool marks, if there are any.
- Underneath, to the right, the 3 little cutters. Most of the work i did with these.
- To the left of them a pin vise with a needle point.
- Then 2 needle files, a rat's tail and flat one.
-And at the bottom a double sided (dental) probe that i've modified into 2 different shaped little scrapers.
And finally, but not in this pic, there's the polishing aids, micro mesh (sand-) paper and polish compound in use with cloth.
The lathe is a Proxxon, db 250. Their bottom range lathe, with nothing fancy but perfect for this kind of work.
I'm going to make a bishop to show you the various stages it took. When i thought of making the set i studied chess pieces and their variety of designs to get a feel for them and their mutual proportions. I turned each separate piece (a pawn, a rook, etc) to the idea i thought it had to be. Holding it in my hand made it even more clear if and where it might needed change. Most pieces were fine straight on, and that piece then became my template for the remaining pieces of the same shape.
I rejected the first bishop i turned for the chess set. It looked a bit too 'fat', too 'thick'. But i kept it and now it comes in handy to show you how i made them.
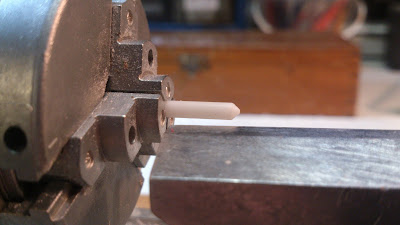
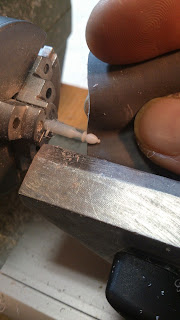
I loaded the lathe with stock and started with the knob that's on the top of the bishop's head.
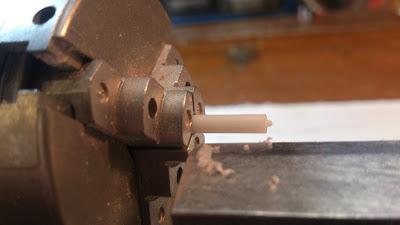
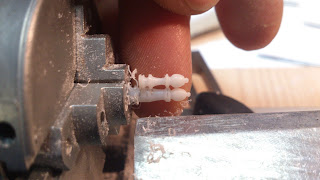
That gave me a marker to hold the first piece in line with, as you can see below. I marked out distinct features to guide. The rim or collar underneath the bishops head, and its feet at the bottom. You really need to keep one eye closed, and the other dead straight in front of your work as you mark out, or you'll be way off '-)
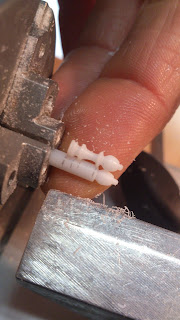
On the left i focused on the shape of his head first, taking away material slowly and checking it often to see where it might need adjusting. Because you can't add but only take away material you shouldn't rush it. When reasonably happy i continued with roughing his collar as you can see above.
With its head sort of 'free standing' it seemed easier to judge its shape and size to the original. I corrected the head just ever so slightly and then stopped turning. Because the neck under its head will become relatively slim it's more convenient to finish & polish the top section while it's still firmly attached to the stock.
Quite handy to do so is a sanding paper called Micro Mesh. Used in the car industry for paint jobs, it comes backed on durable cloth which you can stretch without breaking the sanding surface. It can be used wet and can be rinsed out/washed afterwards. You can buy sets, giving you a selection of grades from 2000 to 12000, so you always have the right one at hand. I started out with 4000 and only when all the tool marks were gone i got up in grade. In this case 8000 and finally 12000.
With the head now finished i slimmed down its neck and again lined it up to match top knob, collar and feet. Making multiple pieces without the aid of a duplicator you can't match up enough. It's better do have done it too much, then to rush it and finding out you've overdone a section which you can't repair or fix.
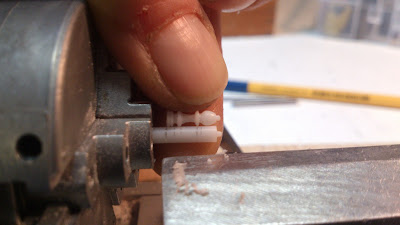
The feet were separated from the mid section with a needle file. For that i used the 'rat's tail'. I made sure to use the same spot on the needle file, in this case a quarter inch from the thin tip. Creating the rim i made sure I gently held that part of the file in the stock so the rim between feet and belly has a constant hight in all the chess pieces.
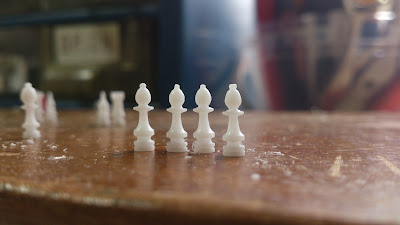
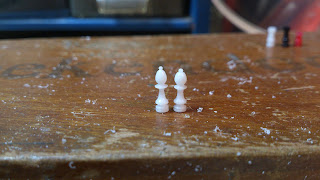
After matching up to align again, the feet were given a decorative rim and then the whole piece was polished where it still needed. And finally he was cut of to stand left of his firstborn twin brother, who's on the right.
Have a wonderful day,
ps. I'll be doing a same sort of posting on the chess board later but, because i haven't taken any pictures of building that one neither, a new one is drying under pressure as we speak (note to myself; don't forget to take pictures during build! :)


Потрясающе !!! Спасибо вам большое за урок!!!!!!!
ReplyDeleteThanks for the tutorial, Debora, I might just try this one day. One way to transfer dimensions to stock if you are going to turn multiples is to mark them on a piece of card stock, a bit easier to transfer from the card than the actual piece.
ReplyDeleteMe ha gustado mucho el tutorial, gracias por mostrarlo, feliz fin de semana:)
ReplyDeleteNice tools! Reminds me of the lecture I went to at the Rijksmuseum on Thursday, where the restorer showed which tools they used to restore this amazing piece of art: a scalpel, a dental tool, a toothbrush...you get the idea. It's what you do with them what's most important.
ReplyDeleteNice tutorial Debora. I have only turned on a lathe once, at the guild school, using a duplicator. But even when using that they didn't all come out the same.
Then a few months ago I turned a few tiny tiny bobbins, using rubbish wood, using my dremel as a lathe and using all sorts of tools I had laying around. Of course I could just make any shape I liked and I didn't have to duplicate the shapes so it was easy, but they turned out really nice and I really enjoyed it. Don't really know why I don't do this more often.
As a follow up on Elga's comment, I was wondering whether it would be helpful to cut the desired (negative) shape on a piece of sheet material, acrylic maybe, with the dimensions on the one side and the actual shape on the other. Then you could keep testing it against this until you have a perfect fit. But maybe it is just too tiny to do this? I don't know.
I did use a negative shape once, can't remember now how it worked for me. I love my duplicator though, on my first lathe even with the duplicator things weren't always the same size. Last year I bought the Sherline lathe, I recently turned quite a few table legs on it with the duplicator and they came out perfectly symmetrical, the lathe was expensive but worth every sent I spend, it is much more accurate than the older one and a pleasure to use.
DeleteI would not like to say what is the best method to turn multiple identical pieces. What i do know is that what ever works best for you personally, in any given situation, is the way to go! If you plan to, or work on the lath often already, then a duplicator can be a great and solid investment for sure. In the same respect; a negative form, for the occasional pieces can be a great (and cost effective) alternative too.
DeleteIn the past i've turned a bunch of knobs and thought of making a negative out of metal sheet cos of the amount i had to make. I'd even beveled and sharpened the edge to be able to use it as the final cut. But i found it rather straining to control a cutting surface that is actually quite large in relation to the material. Perhaps i need more practice :)
I've tried markings on card stock and even used negative forms cut out of card stock too once or twice, but found that to be way too less informative. But like i said, please do use it if it works for you, or any other method you feel works best considering the work on hand. I mean, in the end, making miniatures should be fun :)
Yes, you are quite right, we are all different and what works for one person might not work for another. I think it does take practice and time to get comfortable with a tool too. And definitely making miniatures should be fun!
DeleteWow. I've had a go at turning but my cutters were too big and the piece ended up flicking across the room when I'd finished. Maybe too heavy handed on my part. I think I'll grind some much smaller chisels. The dental tools are a great idea.
ReplyDeleteBeautiful board and pieces. I love the simple idea of a sharpie to colour he black pieces. Wonderful work as always =0)
Bedankt dat je hebt aten zien hoe je die prachtige schaakstukken maakt.
ReplyDeleteFijn weekend Xandra
Great work! Congrats!
ReplyDeleteНет слов! Вы мены просто убили! Невероятно! Я теперь и спать спокойно не смогу!!!
ReplyDeleteОгромное Вам уважение!
Спасибо за урок!
Татьяна
Thank you so much for showing how it's done. Stunning pieces!
ReplyDeleteHugs, Drora
Incredible! and each piece was done separately...
ReplyDeleteSo very interesting---and beautiful :) And thanks for the tip about the plastic for RC models!
ReplyDeleteHow clever! Great work.
ReplyDeleteHugs, Lotte
Thanks for showing us how you do, but its still kind of unbelievable that you really made these by hand! =) Amazing pieces! Hannah
ReplyDeleteGreat tutorial! The pieces are beautifully made and so delicate!
ReplyDeleteThese are wonderful! Thanks for the suggestions of how to make them.
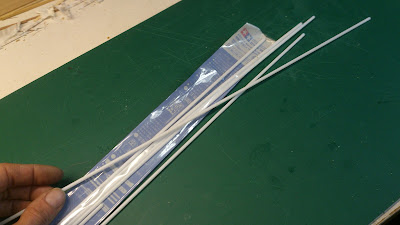
ReplyDeleteAs an idea for alternate material, someone in Castine suggested that he uses acrylic/plastic knitting needles when he needs small turning stock.
That's a great tip Chris. Never thought of that but i can see the potential, definitely! Thanks :)
Delete